Cricut

Monday, December 23, 2013

Another Quick and Easy Christmas Gift

These candles are so super simple to make!  I made all of these in a little less than 20 minutes.  They are so super simple and Lori Whitlock's Echo Park Christmas Reflections kit is just perfect!  Check out my tutorial here.

They look so cute all wrapped up and make a perfect gift for a co-worker, friend or neighbor, or just make a bunch and enjoy a candlelit Christmas Holiday.
For this candle I used Lori Whitlock's Christmas Subway Art

Sunday, December 22, 2013

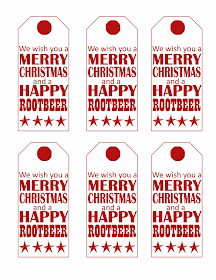
A fun Christmas Gift - Merry Christmas and a Happy Rootbeer

I needed a fun, fast gift for some family friends.. what is better than Rootbeer floats!?!?!  I saw this idea on Pinterest and instantly knew it would be the perfect gift!  Super simple and all you need is a 6 pack of bottled rootbeer, some small ponpoms, googly eyes and pipe cleaners.   I made the tag and If you'd like to go grab them so you can make your own, just click on the photo below

http://www.4shared.com/download/cJD0mO2d/Rootbeer.pdf

Wednesday, December 18, 2013

Day 2 - Epiphany Crafts / Ruby Rock-it!

This project made me giddy!  I just love how it turned out.  I started with a raw wooden frame and raw wooden candlestick.  I Colorshined both of them green, then hot glued them together.  I then simply added lots of fun Christmas goodies and a little Epsom salt for the snow.

The calendar is from the Ruby Rock-it small and large calendar pack.  I used Epiphany Crafts Round 25 bubble caps on the Season's Greetings to make it "pop" just a bit!

Saturday, December 14, 2013

Stocking Stuffers with Epiphany Crafts

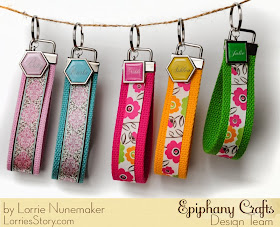
Wristlet Key Chains Anyone?  I played a little bit today.  We exchange only Stocking Stuffers on one side of the family and traditionally I make my gifts.  I decided to use my Epiphany Crafts Shape Studio Hexagon and Square tools and charms to personalize each one.

Arent' these fun?   They are so super simple to make. 


Thursday, December 12, 2013

Oh Christmas Tree! Epiphany Crafts Inspired by Pinterest Week

 Over at Epiphany Crafts were are having an "Inspired by Pinterest" week.  Today my project is featured.  I made this fun tree from ..... NEWSPAPER!  Yep that's right, I cut up the Sunday paper and voila... a Christmas tree is born!
 I've seen so many of these trees on Pinterest... some made with squares that were cut with pinking sheers, some were made with circles instead of squares, some made with book paper and some made with regular scrapbook papers.  There are endless possibilities.  What I didn't see was a decorated tree and especially not one with this blinged out star using an Epiphany Crafts Shape Studio Round 25 Rhinestone charm.
 I added a bit of glitter all over the tree.  It really shimmers in the evening light.  I wish you could see it.
These trees are super simple to make.  To see instructions, go to the Epiphany Crafts blog and check out my featured project.

This is of the Pins that inspired me! Looks like the used book paper and pinked the edges.  Love the flower pot base!


Sunday, December 8, 2013

Free Christmas Printables

http://www.4shared.com/download/bt_H0qHo/1Christmas_Printable_LAN.pdf


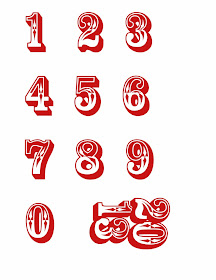
http://www.4shared.com/download/cJ---Jib/1Countdown_Numbers.pdf

Hello there!  Are you getting ready for the holidays?  I have so many things I want to get started on in my craftroom!  Speaking of which, my December daily is still waiting to be STARTED!  I made these cute printables this morning to get me started.  If you'd like to download them, click on the images above and enjoy!

Friday, December 6, 2013

Oh Christmas Tree!!!


OH Christmas Tree, Oh Christmas Tree... how lovely are thy..... wait what are those?   I have been seeing dozens of Pinterest post for the Close to My Heart Trees using the Close to My Heart Cricut Cartridge or Tim Holtz Rosette Dies.  Problem is, I don't have a Rosette Die, and I am a Silhouette girl, but I do know how to make the Rosettes by hand.  I used Heidi Swapp's Christmas Believe Collection.

Here are the measurements I used:

2 strips each (glued end to end) scored every 1/2" of:

12 x 1/2"
12 x 3/4"
12 x 1"   
12 x 1-1/4
12 x 1-1/2"
12 x 1-3/4
12 x 2
12 x 2 1/4
12 x 2 1/2
12 x 2 3/4"
12 x 3

You should end up with 11 Rosettes if you use my method.   You could add some bling (and make them more like the CTMH trees by using a border punch along one long side of each strip).  Starting with the largest rosette hot glue one on top of the other.    (A little hint I got from the CTMH tutorials, was to glue a small circle in the center to both the top and bottom of each rosette.  This helps hold it together as well as gives you something to glue the stack together.  You can see what I mean here.  I basically used her directions without using the Cricut die cuts and I made changes to the sizes. You could also use Lori Whitlock's rosettes from the Silhouette store to make the same thing.

I punched a few snowflakes from some glitter paper to add some extra bling.

For the base of the tree I simply use a strip of paper glued to form a circle.  I used hot glue to attach it to the base of the tree.

Hope you get out a few Christmas papers and make some cute Rosette trees.  This project only took me about 45 minutes to complete start to finish.  Next time would be much faster, as I was kind of winging it the first time.

Wednesday, December 4, 2013

Holiday Treats with Epiphany Crafts and Heidi Swapp Believe

Hello and welcome back from the Holiday weekend.  Did you eat too much stuffing?  Turkey?  I know we certainly did! 

This week over at Epiphany Crafts our design team challenge was to create Holiday Treats.  This is the quick little project I came up with.    Super simple, super fast and kinda cute... don't ya think?

Don't forget about those Epiphany Crafts charms!  They add so much "wow" to any project.   I simply rolled the paper into the cone shape and inserted an eyelet in the bottom point of the cone.  Then I used two jump rings to attach the charm.  The eyelet just gives it a little added protection from tearing and adds a little support for the charm to hang from.  If you don't have an eyelet, you could also reinforce the bottom with extra paper, washi tape or whatever you have on hand.

This cone was a little more simple.  I added some Heidi Swapp Color Magic letters sprayed with Chartreuse Color Shine and kept the rest pretty simple.  I thought it looked a bit more "boyish".

You could really dress the cones up with layers and layers of embellishments.  I ran out of time, but I plan to make a few more and add lots of vintage goodness to them.


Sunday, December 1, 2013

Join us tomorrow for a Lori Whitlock Blog Hop!

Join us tomorrow (Monday, Dec 2, 2013) for a fun blog hop with Lori Whitlock and her paper and digital design teams.

The blog starts at Lori Whitlock's blog and will continue through the entire team's blogs.  There will be a fantastic coupon offer along the way... don't miss it!