Cricut

Thursday, December 31, 2009

Project 365 Blog

I'm going to try and start and maintain a Project 365, inspired by BRIDGET. If you're interested in following it's http://Lorrieslifedaybyday.blogspot.com. This won't be craft related, but an attempt at picking up my camera and using it to photograph everyday life in my world. We'll see how it goes.


Thanks for sharing your day with me

Tuesday, December 29, 2009

My first try at Paisley Cartridge

Well I decided it was time to try out the Paisley cartridge.... this owl s too cute


Thanks for sharing your day with me

Sunday, December 27, 2009

Just a few more cards

I burnt out on the Christmas theme... so I think I'm going as far as I can from that color scheme. These cards are not typical of me... but then again... what is!?!


The following are my attempt at going through some of the K & CO stacks that I HAD to have and haven't used.


Thanks for sharing your day with me

Saturday, December 26, 2009

Friendship card

A card for a special friend....

Thanks for sharing your day with me

Thank you SNOW much!

Another thank you card... wintery not Christmasy...right?

Thanks for sharing your day with me

Back to Crafting

Felt good to get back into my craftroom today. After the hustle and bustle of Christmas... it's so relaxing to just go in my room and zone out. Here's what my mindless wondering came up with.


Thanks for sharing your day with me

Friday, December 25, 2009

Merry Christmas Everyone!!!!

HAVE A BLESSED, SAFE AND HAPPY DAY WITH YOUR LOVED ONES!


Thanks for sharing your day with me

Tuesday, December 15, 2009

Holiday Thank You Cards

The Christmas cards are done and sent and now the presents have started to come in and that means Thank You cards. I made these very simple cards that still have a holiday edge to them, but aren't too Christmasy, are they? The first two are just using up some of my scraps from the Eskimo Kisses by Basic Grey paper


Totally scraplifted this one below from the Cricut Messageboard.. I believe her name was Scubascrapper.. I think it's so simply elegant. She made hers a Christmas Card and had a bow and a sentiment on the outside, but I think it's just gorgeous just as it is.. the bird is a cut from my Slice/Spring Cartridge.
Kept the inside incredibly simple as well:
Same card, different embossing folder
This one is SOOOOO simple, but I wanted to try something similar to the bird... not sure I'm liking this.. it is just a bit too simple


Thanks for sharing your day with me

Sunday, December 13, 2009

I did it.. I made my very own blog background from scratch

I'm so excited! I DID IT! I made my blog background and header from scratch.. it's too fun!!! Hope you like it..

Monday, December 7, 2009

Oscar Meyer would be proud

What happens when your youngest is a Senior and they have a lot of school spirit?... well they all get together and dress like hotdogs to go to the high school basketball games... I don't know why... makes total sense to them! Then during half time they have hot dog races down court.... LOL.. my son is the second from the right. The rest of the boys are all good friends of his.

How to make a messageboard siggy

For those of you who have been asking how to make a siggy for the messageboard I’ve typed up some directions. I hope this helps, but if it doesn’t or if you need additional help.. I’m glad to help.

First of all, you need an image. You can make one yourself or find a clipart or a photo or whatever you want to use.

Secondly, you need to upload that photo to a photo hosting website (I use photobucket, but any site will work). In the photobucket site resize your photo to med or small (I use 300 x 300 pixels – you can put those numbers in your resize box if you want or use the preset sizes and change it to med or small depending on how big you want it. Save your photo in photobucket.

Now the next step is based on whether or not you want the siggy/image to be a link to something (when you click on mine it takes you to my blog) or do you just want an image as a signature (nothing happens when you click on it).

If you want a linked image copy and paste the code below into your profile signature box… don’t worry I’m going to walk you through changing it. This is the code to my siggy for illustration purposes.

[link=http://scrappinstuff-lorrie.blogspot.com/][image]http://i292.photobucket.com/albums/mm23/lanunemaker1/reindeersiggy2.png[/image][/link]


If you just want a siggy that is not linked copy and paste this info

[image]http://i292.photobucket.com/albums/mm23/lanunemaker1/signature-1-2.png[/image]


NOTE: UPPER/LOWER CASE DOES MAKE A DIFFERENCE...


Once you’ve copied and pasted it change the text in blue (if you're doing a linked siggy) to your blog (or whever you want you siggy to link to).

Now you need to go to your photobucket file and copy the Direct Link code that photobucket gives you, now go back to you messageboard profile signature box and highlight the text in red, right click and paste… that will put your photobucket direct link info in place of mine. Click Apply. Voila.. you did it!

If you want to change your siggy (as I often do).. lol just upload a new picture to photobucket, copy your direct link and replace just that text that is in red again and you did it again, you changed it. Theat is the only part of the code that changes once you have it set up is the photobucket direct link code.

Make Sense???

Sunday, December 6, 2009

My cardmaking day


Here's the fruits of my labor...lol (Yesterday my friend and I got together and just worked on our Christmas projects). We crafted our little hearts out. We started around 9:30 am and worked till about 8:00 pm... whew

Tuesday, December 1, 2009

My first layout with the 2nd set of online classes

Well I enjoyed the first session of classes so much, that I signed up for the 2nd set of classes.. whew.. this layout had so many new techniques.. I'm going to have to do it again so I can remember all that I learned. Be warned.. if you decide to take the classes.. it ADDICTING!
The photo I used in this layout was one I took on my deck last summer.. I thought it was a pretty cool photo. This butterfly let me get right on top of it and it never moved.

A Christmas Card


I bought this stamp set in Chicago during our weekend. I thought it was so cute, I didn't do it justice.. but practice makes perfect, right?!?!

Sunday, November 29, 2009

A card with my Slice

I mentioned a few posts ago that I got some free Slice Cartridges. Among them I received the Mistletoe cartridge. I made this card from that cartridge.

Owl Christmas Card


Just a quick card.. I'm working on them for a few minutes here and there.. hopefully I'll have enough when the time comes to send them out. BTW.. when do you send out your Christmas/Holiday Cards? I got two in the mail today.. (Nov 28th)... whew.. that's motivation!

My try at the Martha Stewart Branch Punch

Bought this punch last year and was too intimidated to try it. Well one more thing I can cross off my list... "Use MS Branch punch"... Check

Book about Me - Challenge #6


Well, I took a break from the Book about Me so I'm a few weeks behind in challenges.. but next in line was Challenge #5 - Your Siblings.

Friday, November 27, 2009

Inspired by my Blog Header! LOL

I was looking at my blog header and thought.. hmmm...

Inspired by Custom Crops

This card was inspired by one I saw on Custom Crops. I love sewing in cards.

Tuesday, November 24, 2009

Holy Slice!

Oh My Goodness! I bought the Slice a while back... I think in the beginning of Sept or so.. anyway.. I love it it works great. Then I bought the tagmaker cartridge to go with it and the accessories to make the tags... well I tried to make a tag it it cut all wonky, the circles would not fit into the rims. So I contacted Making Memories and no response. I emailed them a second time and I got a response that basically said our techs are looking into this issue, so I wrote back a third time and wasn't so nice... I explained that if there is a known issue then the product needs to be pulled from the shelf as the entire system is a bit expensive, and if it's just my Slice's issue, then replace it. Well, I got a letter from a higher up apologizing for the lack of a resolution to my problem and he said they would be sending me a brand new slice and a few goodies for my troubles. Well the box came today... HOLY SLICE! They sent me FIVE cartridges, the tool kit, the cartridge case, the embossing kit and a new machine.... OH MY GOSH! How fun!!!! Now I already have one of the cartridges they sent me... so if you have a Slice let me know which carts you have and if you don't have it, I'll RAK the one they sent. If there's more than once person, I'll draw a name. Woohooo! Guess that's my Black Friday!! :)

Monday, November 23, 2009

My final lesson in online class
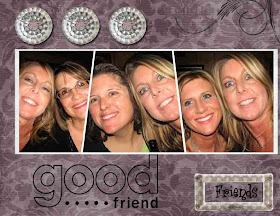
Well this is nothing speical, just using some things learned in the last lesson.. (how to make trapezoidal photos.... anywho.. anyone interested, I highly recommend Jessica Sprague's online classes. Starting today (Monday, 11/23/09) she's offering 20% discount on everything on her website. Great time to sign up and start. I just purchased the next set of classes. I started with Up and Running with Photoshop Elements and now I'm going to start Now We're Rockin' with Photoshop. I also used some of my new Stampin Digital Studio Software elements on this layout that I designed in Photoshop.

Sunday, November 22, 2009

Winter Woodland Snow Girl

Playing with Winter Woodland today. That little snowgirl is so cute! The paper is Peppermint Forest and the Stamp is Stampin' Up... a birthday gift from Barb (aka Snowmanlover)... Thanks Barb!

Saturday, November 21, 2009

Gypsy Pinwheel Card


I did it! I made a pinwheel card all by myself! LOL

Lesson #4 - Learning Photoshop


Here's my latest lesson from Photoshop Elements classes with Jessica Sprague.

Friday, November 20, 2009

Sewing on cards

Well this morning I was getting ready for work when I noticed a big 'ole hole in the back of my sweater, so I had to get the sewing machine out and do a quick fix. Since it was out and I had time I thought..hmmm... why not! lol So, whipped this up with some scraps

Another card using the New Christmas Solutions cartridges. The pic makes the snow look kind of funky, but it looks better in person. Come on over.. I'll show you! :)

Whew!

Whew.. this card went through about 4 makeovers! I could not get it right. It started out as a penguin card and was a long card.. that didn't work out, so I tried to use the same elements and turn it around the other direction... still wasn't working for me, so I came up with another thought, lose the penguins and go with this stamp.. then I stamped this right on the cardstock and it was a bad stamp...so I lopped off the ends of the card and this is where I ended up with my happy penguin card! lol